How to Choose the Right Handheld Gauge

Quality Digest Magazine has a feature metrology article that caught our attention this month – How to Choose the Right Smart Handheld Gauge. 

The author suggests key considerations in making your manual gauge selection includes gauges designed for manufacturing environments, that they be repeatable and reproducible, and have options for variable data collection.

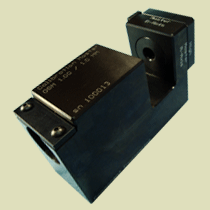
For TruPosition probes, we check all the boxes to meet manual quality inspection gauging needs on the production floor:

  • Simple, intuitive design.
  • Build for tough environments.
  • Repeatable and reproducible.
  • Options for variable data collection.
  • Options for tight spaces, tight tolerances, and specialty needs.

Read the article.

Find Your Application to see our manual gauge options.

Contact Us for additional information.
Gaging case study

January 29, 2021

Gaging case study

Eliminated labor-intensive inspection process, increased inspection cycle time, and enabled future production expansion without incremental quality inspection expenses.

Challenge

A global leader in automotive die-cast components was charged with delivering 100% inspected parts while maintaining profitability. Their current process was labor-intensive, and time consuming – requiring either manual (handheld air gaging) or CMM inspection. Additional key inspection challenges included diameter checks on stepped bores, repeatability of inspection and correlation to CMM data.

SOLUTION

Component Engineering partnered with Mahr Metrology to design an auto-gage that addressed key inspection challenges and streamlined the overall quality inspection process.

Our auto-gage solution integrated Mahr air gaging to provide accurate and repeatable variable data for a total of six (6) bore diameters. A TruPosition probe and LVDT’s were also used to check the mating surface profile and alignment hole true position, all within the required cycle time of <60 seconds. The inspection work cell was also designed to enable future automated part load and unload, freeing up skilled staff to support other parts of the production process.

OUTCOMES AND BENEFITS TO THE CUSTOMER

Improved Efficiencies

By providing an automated inspection process we avoided the labor-intensive requirement for every part to be inspected by hand or via a CMM. Also, by greatly reducing the inspection cycle time, we have enabled future production expansion without incremental quality inspection expenses.

Accurate Quality Outputs

Correlation work gave our customer confidence that each part was being inspected to the same criteria and standards of the traditional CMM process.

Repeatability and Reproducibility

– <10% on all features – tolerances
from .03mm to 1mm.

Component Engineering are experts in designing and building the inspection tools you need to deliver quality finished parts.

Contact us today to see how we can help you.
[email protected] | www.cequalitysolutions.com

TruPosition | quality. Measured.