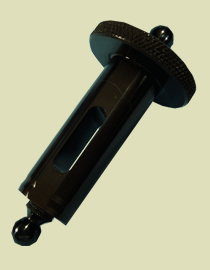
TA1.25-95-Tooling Aids
[vc_row][vc_column][vc_column_text]
Description:
Tooling aids are used for locating Component Engineering Probe Blocks in a three-axis coordinate system. For example, the TruPosition Probe needs to measure a hole location normal to surface. That means, the probe block needs to be set normal (perpendicular) to surface, as it guides the probe to the hole.
The tooling aid has (2) 12mm tooling balls in each end that are concentric to the O.D. One end is located at the X Y Z coordinate of the hole, the other end is a point normal (perpendicular) to the surface and equal to the centerline distance of the tooling balls. A CMM can now measure the location of the tooling balls to verify if the block is located properly and if the 3rd axis stop is set to the proper distance from the surface.
Features:
- A-2 Steel construction HT 58-62 R/C.
- The shaft is precision ground to the same diameter as TruPosition Probes.
Note: Does not set the rotation or concentricity of the axis orientation ring. See TA1.25.
Designed to work with 1.25” Dia. blocks and 95.0 mm part/surface offsets.[/vc_column_text][/vc_column][/vc_row]
For CAD files, right click on link select "Save Target As"
